
How to Set Up Two-Factor Authentication for WordPress Users
We encourage all Viterbi WordPress users to set up two-factor authentication (2FA) to their WordPress account for added security. Two-factor authentication is required for all WordPress users. It is also required for each unique site. This page will give you step-by-step information on how to do set up your two-factor authentication.
Viterbi WordPress 2FA is managed through Wordfence, which has an official documentation how to set up two-factor authentication here.
*New users will have a seven-day grace period to set up their two-factor authentication.
Step-by-Step Two-Factor Authentication Set-up
- Log in to your WordPress account.
- Once you are in the WordPress dashboard, you can access 2FA from either Login Security menu item on the left or through your profile.
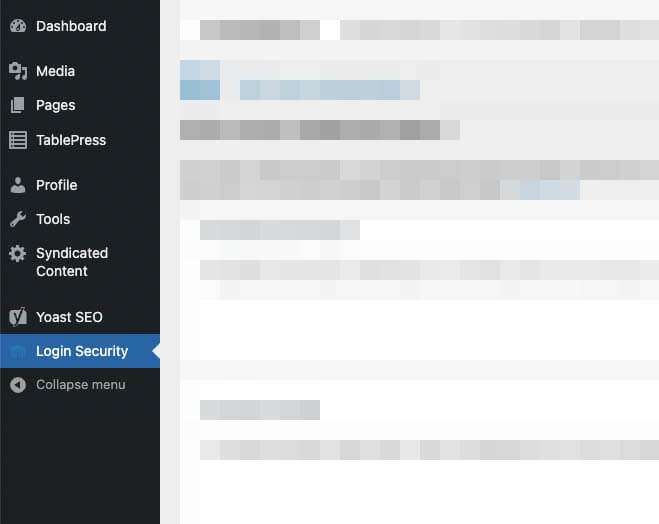
Access login security through the menu
- Select "Login Security" from the menu
- You might see one of the two views below to access Login Security.

Access login security through your profile
You can access your profile on the top right of your screen. You can click on 1, 2, or 3 area to access your profile.


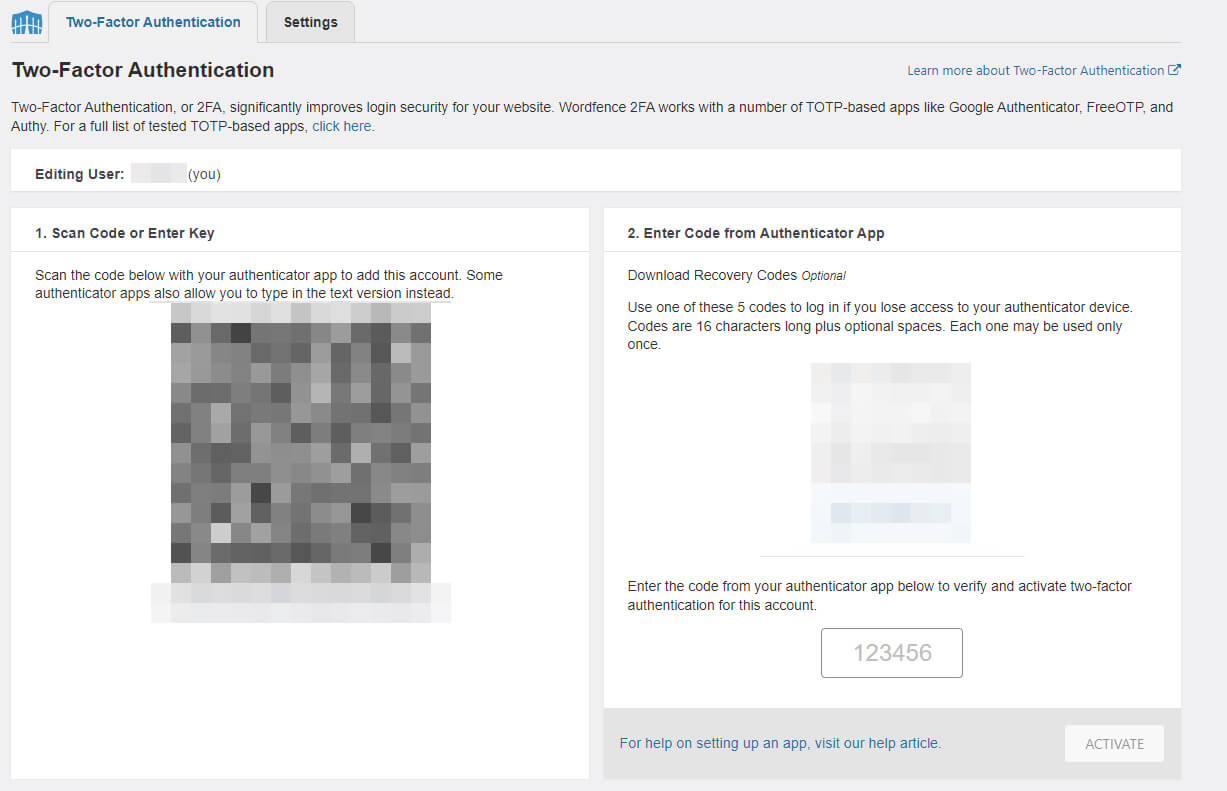
- You have the choice to either scan the QR code or write out the code seen below the QR code located in box 1 onto your authenticator application.
- Download the backup passwords located in box 2 and keep it safely.
- Your application should now show an activation code. In box 2, use that code and click ACTIVATE.
It is highly recommended to log out and test the login process with 2FA. If you are locked out, please contact the web team through myViterbi.